Have you ever uploaded a photo to Instagram and thought… wait a minute?! It looks a little..off. Soft, pixelated, gross. Like it was taken on a potato.
Sound familiar?
If Instagram is ruining the quality of your images after you’ve spent time perfecting them in Lightroom, then this blog post is for you! Today I’m going to talk you through the exact Lightroom Export Settings I use to ensure my images are crisp and sharp when uploaded to Instagram.
Step One: Crop to the Correct Aspect Ratio
The key to keeping your photos sharp is to crop and resize them before uploading, instead of letting Instagram do it for you.
There’s only really one size you should be uploading at – 4:5. This is the largest pixel size you can upload and means your image will take up the most size in the feed (almost the whole phone screen).
Square images (1080 x 1080) are ok, but 4:5 images are best.

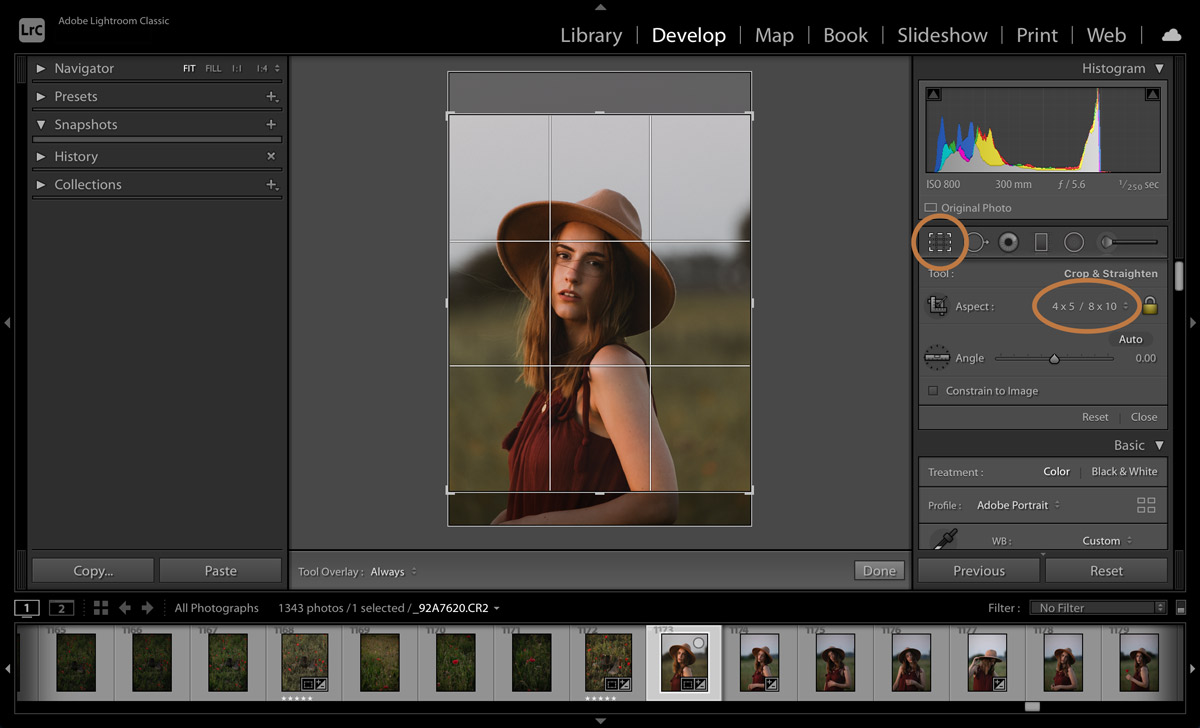
In the develop module, go to the adjustment panel and click on the square on the left to open up the crop tool. A handy shortcut is to just hit the letter R on your keyboard.
Navigate to where it says aspect and then click on 4 x 5 / 8 x 10. Press X on your keyboard if you need to switch crop between portrait and landscape orientation.
When you’re finished, just press enter on your keyboard.
Step Two: Export Settings

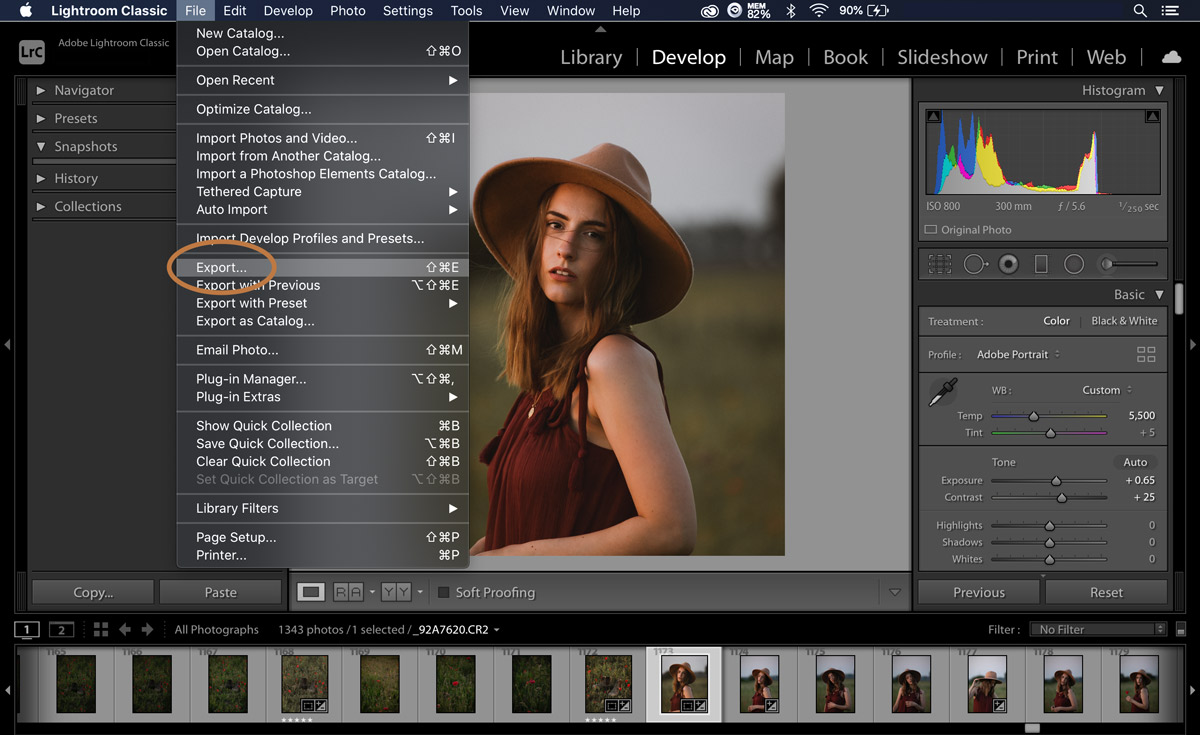
Next up, click on the “File” option from the dropdown menu in Adobe Lightroom and select “Export”.

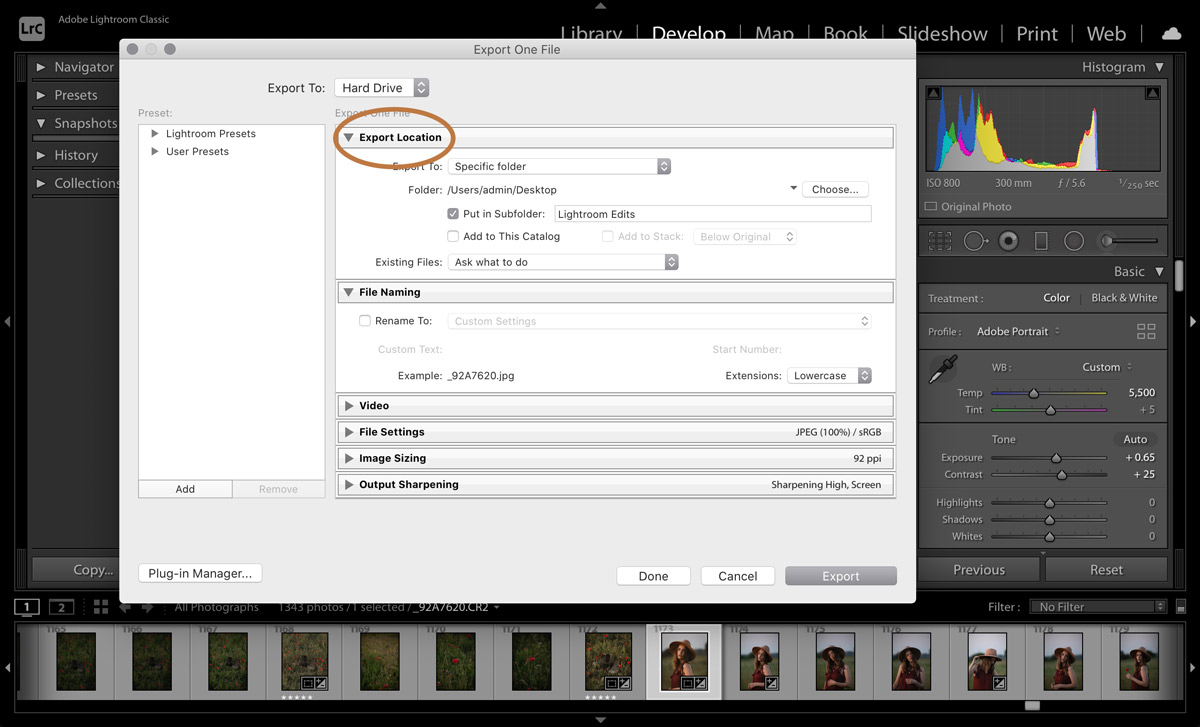
The first two tabs allow you to set the file location and name. I normally export my edits onto my desktop in a sub folder called Lightroom Edits so they’re super easy to find (my desktop is always a mess!).

Next up in the “File Settings” tab, you need to set “JPEG” as the Image Format. Colour space should be set to “sRGB.” If you select other profiles like Adobe RGB or ProPhoto RGB, the colours will change when you upload the image to Instagram.
Now, there’s a lot of different opinions out there regarding the quality slider. I personally set it to 100 and find that gives me the sharpest result.
You don’t have to limit the final image file size. So, make sure that box is unchecked.

Then move down to the next section; image sizing. You’re going to check the box here that says “Resize To Fit” and make sure that you have “Short Edge” selected.

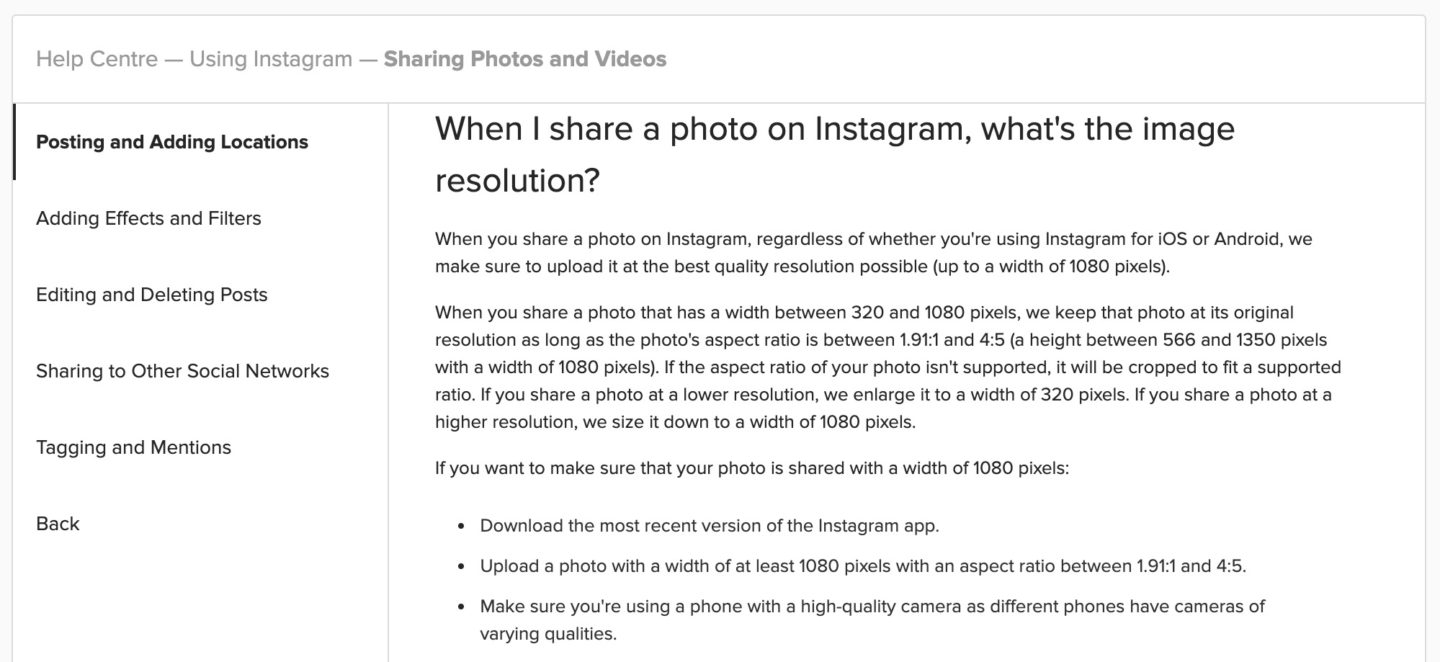
On the Instagram help site they state the maximum file size they’ll accept without resizing is a width of 1080 px and a height of 1350px. So to avoid compression change the number to 1080 pixels. Change the resolution to 72 pixels per inch and ensure the “Don’t Enlarge” box is checked.

The next step is to apply output sharpening. You can play with this and see what you prefer! I generally keep this set to high.
Once you’re happy with everything, just click the export button and Lightroom will export your image ready for Instagram, into the folder and location that you specified!
Step Three: File Transfer
The last thing to remember is to make sure you’re using a method of file transfer that doesn’t compress your image. I personally use Airdrop to ping images to my phone, but you can also use something like Google Drive or Dropbox.
And that’s it! I hope this tutorial has been helpful. You can check out the image used in this example on my Instagram here.
PIN IT TO PINTEREST!
